Friday, November 13, 2015

Dog Collar Bandana

My neighbor recently purchased a dog collar bandana at the vet for her dog. It was made of fabric that was Halloween themed.  It got me to thinking..."I can make that and make it better!!"
So here's how I made mine!
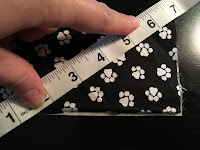
First measure out the fabric needed. For a large bandana you will need two pieces of coordinating fabric that measures 10"x9". For a small bandana you will need the pieces to measure 7"x6".  Make sure to iron your fabric.

Next cut the points. Fold the fabrics in half the long way. For a large, mark 4" from the end. For a small mark 2.75" from the end. 

Cut the fabric from the mark you just made to the folded corner.
I choose to monogram my bandanas at this point. I centered my monogram here:
Place right sides together and sew the all the edges except the top. Turn right side out and sew around all the edges in matching thread. 
Turn the top edge down. Determine this size by the size of the collar you are using. For the large bandana I turned down 1.5". For the small I turned down 1". Use a zig zig stitch to sew the top down.

You are done! Admire you great work!!!


Thursday, August 6, 2015

Makeup Drawer Organizer


Recently a friend said she was making a drawer organizer for her makeup. 
She found an idea on Pinterest:  


What a great idea!!!

My drawer is pretty small....I long for the larger drawer I had in our old house!  


So I followed the directions from the video above:
1. Measure the drawer.  Make sure to measure the bottom and the sides accounting for the size of the foam.  Decide where you want the dividers to be and measure for that too.
2. Cut pieces out of foam board following your measurements. I got foam at the Dollar Tree. Make sure the foam fits right before moving on!
3. Cut fabric for all of your pieces. I used a cotton for the bottom and a duck cloth for the tops. Got those at Hobby Lobby, my favorite store!
4. Put the fabric on with adhesive spray. Also got the spray at Hobby Lobby.  This part was NOT fun! I got adhesive spray all over my fingers, ugh!
5. Once all the fabric is on, begin placing in your drawer. If all fits like it should, glue the sides and the bottom together with a glue gun. 
6. Glue the inside dividers in with glue gun. 
7. Once all is dry, you are ready to load up!


Here is my finished drawer:


I love it! 

Sunday, July 26, 2015

That's my theory..... I say this often to my husband. It has become a bit of a joke between us. I didn't realize that I seem to have a theory on everything!
I do a lot of crafting and cooking and looking at crafting and cooking on Pinterest. I have this theory (there I go again) about creating a blog of things found on Pinterest, tried and posting about the outcomes. So, welcome to That's My Theory. Come along for the ride!